Inherited a stash of family photos from deceased parents? Albums and envelopes stuffed with printed photographs. Just prints, no negatives. So how do you care for them and preserve them? And what do you do if your siblings also want copies?
Scanning – the Traditional Way
When my grandfather passed away in 1966, my mother and her siblings inherited photos…many boxes and albums full of them. The rare photos documented not just my mother’s and grandparents’ lifetimes, but also of previous generations. For nearly 50 years, these inherited photos remained divided between nine families, separated by hundreds of miles.
In early 2012, my oldest uncle, then 86 and researching family history, started on an ambitious project to reunite and digitize this trove of photos. The idea was to make a combined digital library that could be shared by the entire family. It was a slow, tedious, yet nourishing process – and after a year, less than a quarter of the inheritance had been scanned. Then he found a faster way to do it, but more about that later.
Saving & Sharing Inherited Photos
What to do when older relatives pass and you inherit their collection of old photographs – picture albums, shoe boxes and manila envelopes stuffed with family photos? Legacy that forms an important part of your family history, yet you cannot put names to many of the faces and places in those fading, decades-old photos.

Preparatory steps
This short article suggests steps to get your treasured photos ready for conservation. The steps are: Assess, Protect, Sort, Start and Store.
Anything missing? Yes! The only way to save fragile pictures for posterity is to scan them. Let’s check out a fast and easy DIY way to do this.
Once you have assessed and sorted your photos, consider scanning the best and most memorable of the lot. This preserves them forever, and also makes them portable and shareable. Digitizing also makes photos easy to enhance, restore, label and organize.
How to scan photos
Option 1: Desktop scanner
When it comes to scanning, we automatically think of conventional desktop scanners. There’s plenty of choice when it comes to specs and prices. A good one for home use will set you back between $100 and 200. Here are a few. They’ll all give you high resolution scans, but one thing you MUST look for in their bundled software (Unless you’re a Photoshop wiz), is the ability to batch crop multiple photos scanned together. This is a great effort saver.
Well, my old uncle started down this route with an Epson. He would fit as many photos as he could on it, scan and transfer to his Macbook; auto-crop with the bundled software; and edit them with Photos for Mac. The quality was impeccable, but it was very, very slow going.
Option 2: Photo scanner app
How Pic Scanner Was Born
In early 2013, dear uncle got an iPad, and was promptly roped in to test my under-development app Pic Scanner. Released in mid-2013, Pic Scanner was the world’s first mobile app for scanning and auto cropping multiple photos at a time. From then, it took my uncle just eleven weeks to finish scanning everything. Every question he asked, every time something confused him, we learned where our UI (user interface) needed improving. Every time he said, “I wish this app could…”, we got a new feature for our “to-do” list.
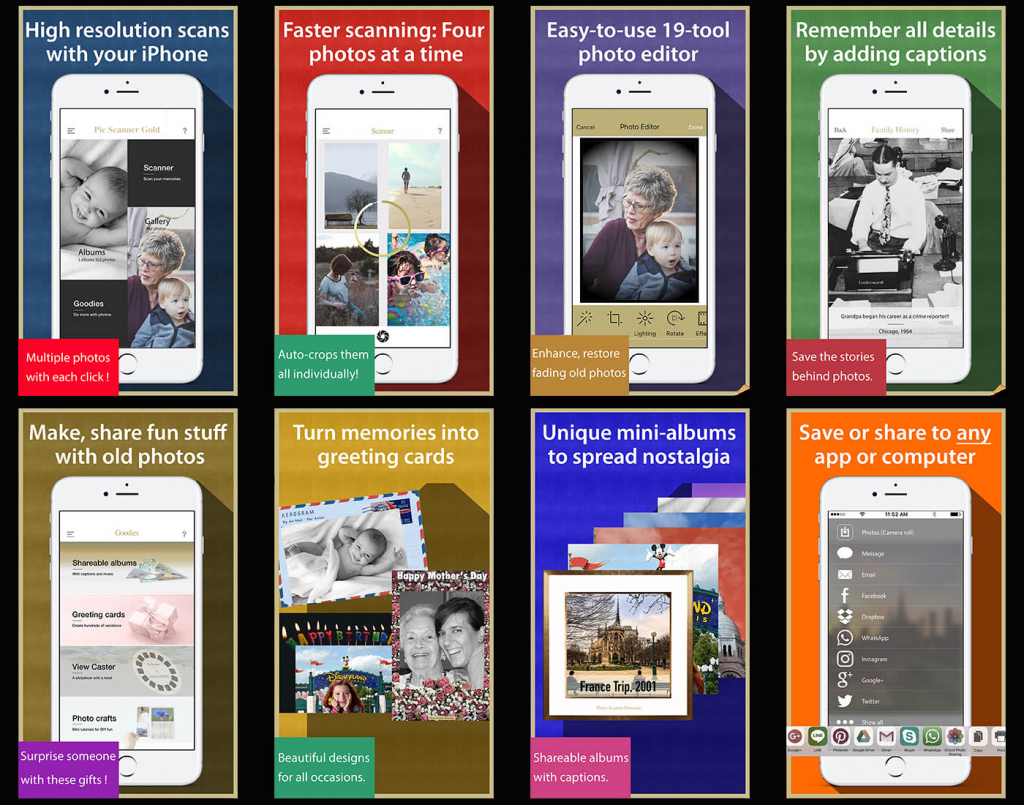
He especially loved the app’s multi-scanning, auto-cropping capability: You scan several photos with one tap, and the app detects, perspective-corrects, and saves all the photos. We should mention, however, that this is great if you are scanning photos to post on your Facebook page. However, when scanning old photos for archiving or reprinting, always scan one photo at a time. Scanning will take a little longer, but automatic cropping will still save you a lot of time.
Going Pro: Pic Scanner Gold
Pic Scanner got a lot of praise and attention, but users also bombarded us (nicely 😊) with requests for more features. So, a couple of years later, we released Pic Scanner Gold. This was a much more advanced app, with many unique features.
Another factor that played well for us : the huge improvement over time in Apple devices’ cameras. When we started work on Pic Scanner, it was on an iPhone 4 with a 5 MP camera. Current iPhone and iPad models have 12 MP cameras, and much better sensors. Our proprietary algorithms harness this power to capture high resolution scans with relatively small file sizes. Both apps’ features are designed specifically for old photos. These include editing tools to enhance and restore fading photos, and Captions feature to add date, place and other details (More about these and other feature here).

Scanned. Now what?
Upload scanned photos to your preferred cloud service. Pic Scanner Gold provide direct links to iCloud, Google Photos, Dropbox, and many other apps. Uploading to cloud serves two purposes: One, it ensures that your photos stay safe even if your iPhone or iPad is lost or damaged. Two, you can share photos with family members, and invite them to help add the forgotten details.
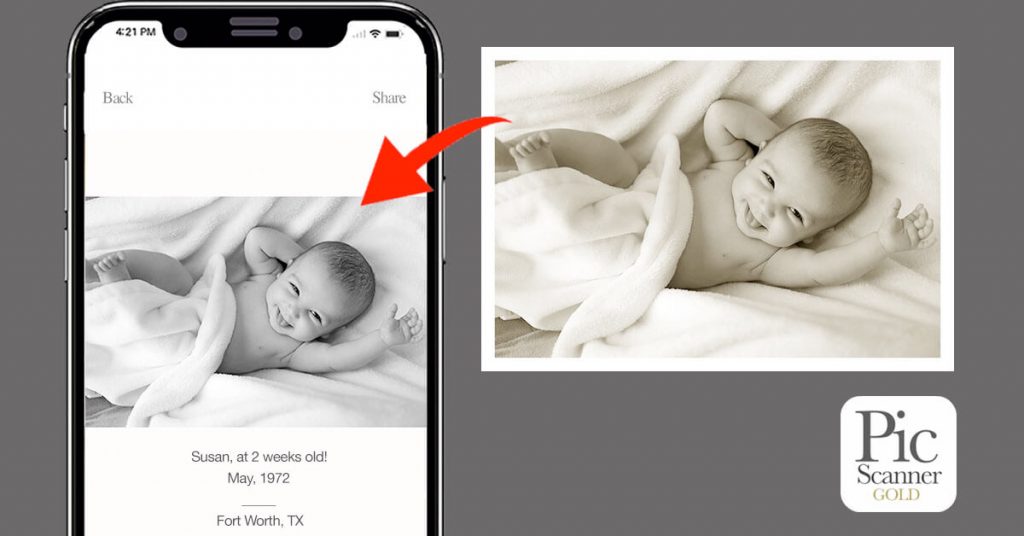
Many apps allow you to capture these details electronically. This extra effort is well worth it, since it ensures that the stories behind every photo are preserved. In Pic Scanner Gold, you can use the ‘Captions’ feature to save these details, as shown in the example below.

If you have iPhone 6S / iPad Air 2 or a newer device, get Pic Scanner Gold. It gives much higher quality scans and has a raft of useful features. Here is the App Store link. Our lightweight app Pic Scanner is terrific for older devices. It can be downloaded here. User guide for Pic Scanner Gold can be found here, and for Pic Scanner here.


